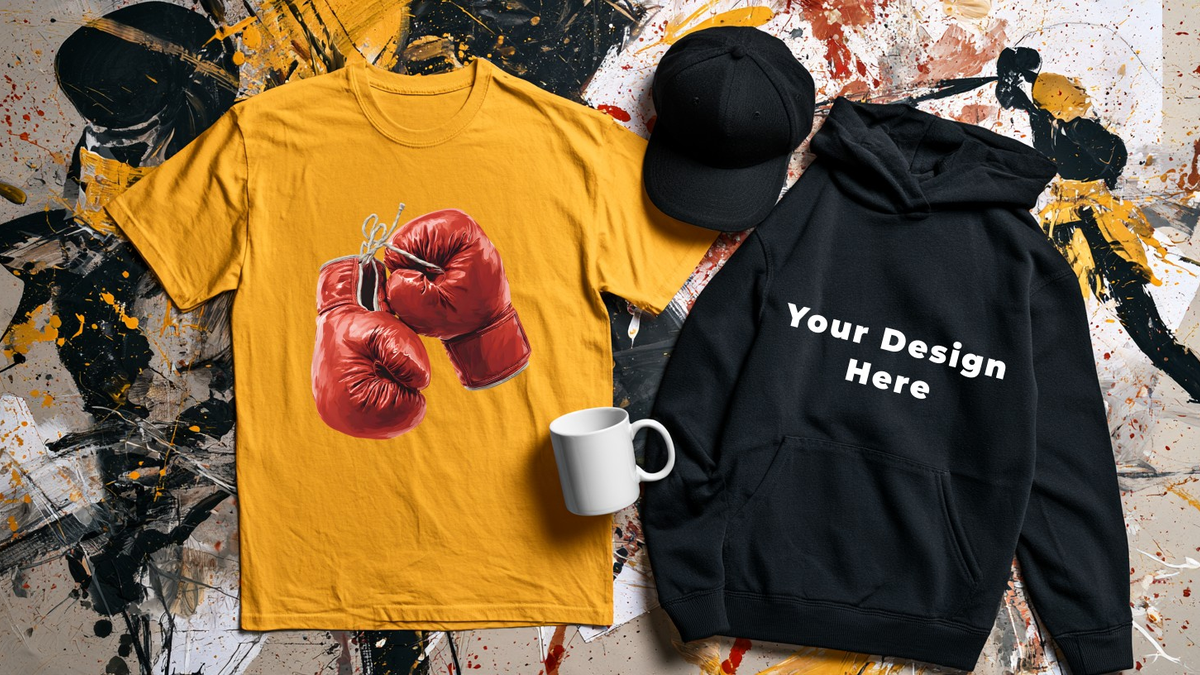
Welcome to the ultimate guide to bringing your creative visions to life! Whether you are looking to refresh your personal wardrobe, elevate your daily style, or design a truly unforgettable gift for someone special, custom clothing is the perfect solution.
At 33pixel.com, we offer a wide variety of high-quality, print-on-demand products tailored to your everyday life. From comfortable T-shirts, hoodies, sweatshirts, and shorts to stylish caps and hats, we have your apparel needs covered. Looking for something beyond clothing? We also feature everyday essentials like custom mugs, bags, and unique lifestyle accessories ready to be personalized with stunning designs.
How it Works: Smart & Sustainable Production
To bring you the best possible experience, 33pixel.com operates using a print-on-demand business model in partnership with Spreadshop (Spreadshirt), a globally trusted leader in third-party fulfillment.
This partnership means we hold zero inventory and eliminate waste. Every single product is made-to-order: it is printed only after you place your order, ensuring a high-quality finish crafted specifically for you.
What You Will Learn in This Guide
Bringing your ideas to life is quick, easy, and entirely up to you. Whether you want to browse and choose from the unique designs already featured in our shop, add a personalized message with custom text, or upload your very own picture to create a one-of-a-kind masterpiece, the possibilities are endless.
This detailed, step-by-step tutorial will show you exactly how to create unique custom merch for yourself or your favorite people. From choosing the right products to perfect placement, let’s dive in and start designing! (Please note: While this guide features desktop screenshots, the exact same principles and features apply smoothly on mobile devices as well).
Step 1: Launching the Design Tool
Getting started is incredibly simple, whether you want to build a design from scratch or personalize a product you found while browsing.
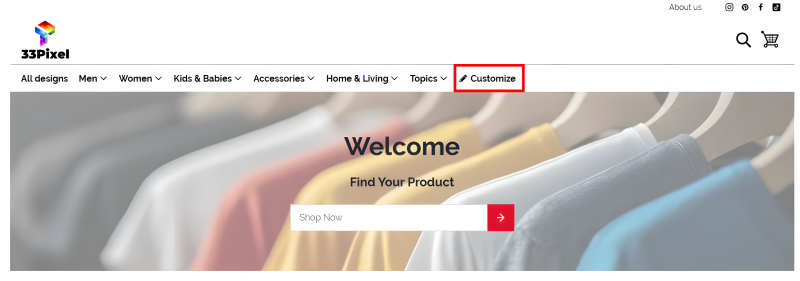
Starting from the menu: From the top menu of the website, simply click on “Customize” (outlined in red in the picture below). This will take you straight to the main design tool canvas.
Customizing a specific product: If you have already selected a product while shopping and you want to modify it, click on the customize button (represented by a pen icon and outlined in red in the picture below).
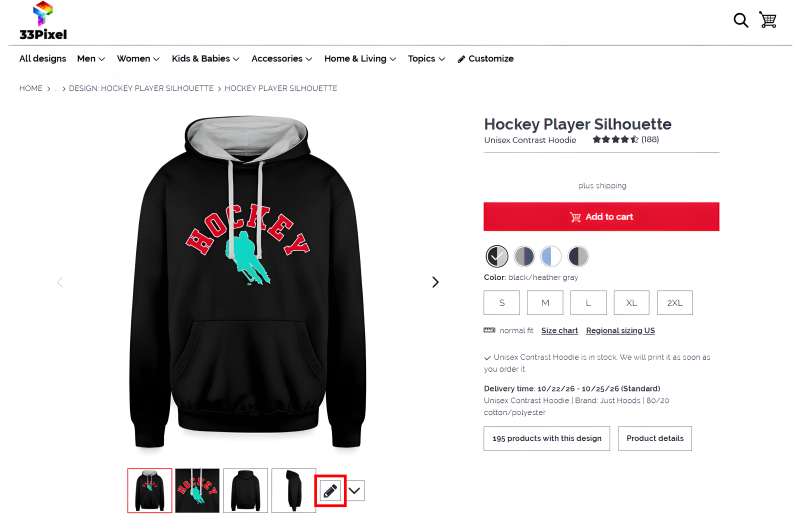
Both paths will instantly open up the creator studio, ready for your personal touch!
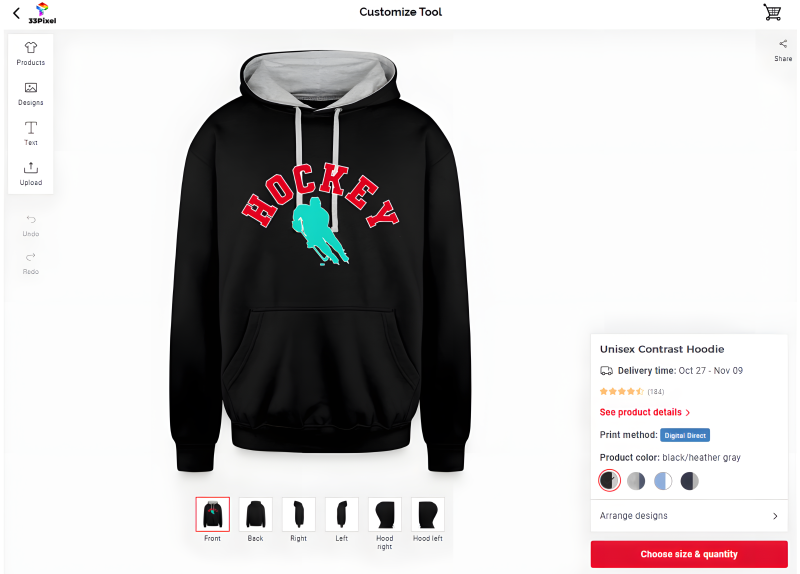
Navigating the Design Studio Interface
When the creator tool opens, you will see a main live preview of your product in the center, flanked by an intuitive control panel. Here is a quick breakdown of the core options available at your fingertips:
- Product Selection: Easily swap between different apparel styles, colors, and sizes without losing your current design layout.
- Designs Tab: Browse through our curated collection of ready-to-use graphics and illustrations.
- Custom Text Tool: Add personalized names, quotes, or slogans with full control over fonts, colors, and sizing.
- Upload Feature: Bring your own custom photos, logos, or digital art directly from your device into the studio.
- Print Area & View Selector: Toggle between the front, back, and sleeves of the garment to ensure your artwork lands exactly where you want it.
Step 2: Choosing Your Base Product and Color
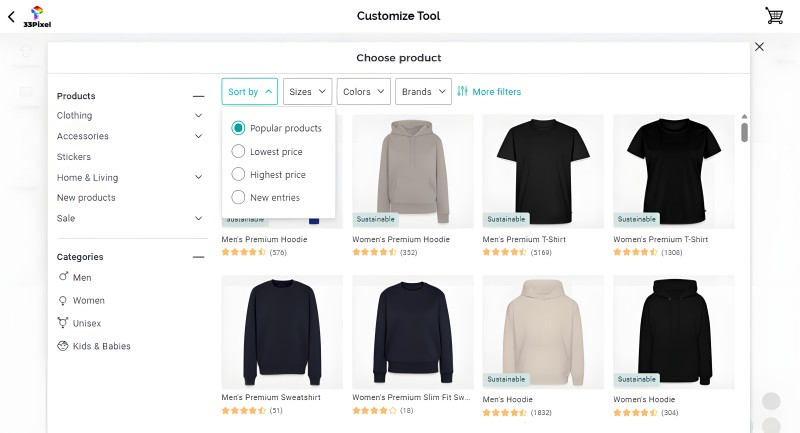
Before diving into the artwork, you want to make sure you are designing on the perfect canvas. The creator tool allows you to swap products and play with colors instantly.
- Change the Product: If you want to switch from a t-shirt to a hoodie, a mug, or a cap, simply click on the “Products” tab in the control panel. A catalog will open up, allowing you to browse through all available apparel and accessories.
- Pick Your Color: Once your product is selected, a color palette row will appear beneath or alongside it. Click through the color circles to see a live preview of how your item looks in black, white, navy, or any other shade offered.
Tip: Keep in mind how your design colors will look against the fabric color you choose. A dark design looks best on light shirts, while a white text will pop perfectly on dark hoodies!
Step 3: Adding an Existing Shop Design
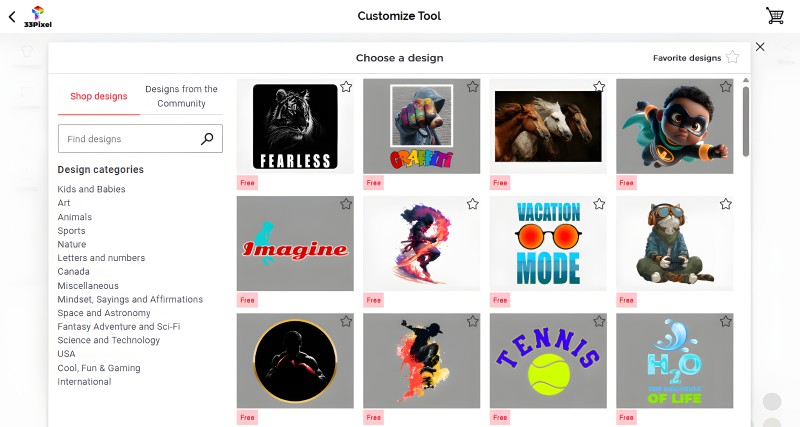
If you want to use one of the unique graphics or illustrations already available in our shop, the process takes just a couple of clicks.
- Open the Designs Tab: Click on the “Designs” button in the control panel. This will open a gallery featuring all the pre-made graphics and artwork offered by 33pixel.com.
- Select Your Artwork: Browse through the collection and click on the design you want to use. It will instantly appear right in the center of your product’s print area.
- Adjust Size and Position: Click on the design directly on your product preview to move it around. Use the corner handles to scale it up or down, or rotate it until it looks exactly the way you want.
Tip: You can use the search bar within the designs tab to quickly filter through specific themes or keywords to find the exact graphic you are looking for!
Step 4: Uploading Your Own Photo or Image
If you want to create a truly personalized item using your own digital art, family photos, company logos, or custom graphics, you can easily upload them directly into the design studio.
- Open the Upload Tab: Click on the “Upload” button in the side control panel.
- Select your File: Click on the upload zone or drag and drop your image file straight from your computer or smartphone.
- Place and Scale: Once the upload is complete, click on your image thumbnail to place it onto the product. Just like shop designs, you can drag the edges to resize it, center it, or adjust its position within the designated print area.
Tip: For the absolute best print quality, make sure your uploaded image is high-resolution (300 DPI is ideal) and saved in a PNG format with a transparent background if you don’t want a solid white box around your artwork!
Step 5: Adding and Customizing Your Own Text
Adding a personal quote, a name, a funny slogan, or an important date is one of the best ways to make your merchandise completely unique.
- Open the Text Tool: Click on the “Text” button in the control panel. A text box containing a placeholder will instantly appear on your product preview.
- Type Your Message: Double-click inside the text box on the product or use the text field in the panel to type your custom message.
- Style It Your Way: Use the text formatting options that appear in the control panel to fully customize the look:
- Fonts: Browse through a wide variety of fonts, ranging from clean modern types to elegant scripts or bold retro styles.
- Colors: Change the text color to match or contrast beautifully with your product’s fabric.
- Size and Alignment: Scale the text up or down using the corner handles, and align it perfectly (left, centered, or right).
- Bend Text: Curve your text into an arc or circle to create a unique, dynamic layout around your designs.
Tip: You can combine text with existing shop designs or your own uploaded images to create a layered, multi-element design!
Step 6: Reviewing Print Areas and Finalizing Your Order
Before you head to the checkout, you want to double-check your design from every angle to ensure it looks flawless.
- Check Different Print Areas: Many of our apparel items allow you to print on multiple sides. Look for the product view selector (usually located beneath or right next to the product preview) to switch between the Front, Back, and Sleeves. You can add unique designs or text to these different areas!
- Review Size and Fit: Take a final look at the position and scaling of your designs. Make sure no text or critical parts of your image are cut off by the borders of the designated print area.
- Select Your Quantity and Size: Once you are completely satisfied with your masterpiece, choose your desired size and quantity from the product options panel.
- Add to Cart: Click the prominent “Add to Cart” button.
From there, you can either continue designing more custom items or follow the secure checkout steps to complete your order. Because 33pixel.com partners with Spreadshop, your order will be safely processed, printed on demand, and shipped directly to your doorstep!
Conclusion: Start Creating Your Masterpiece Today!
Designing your own custom merchandise is a fantastic way to express your unique personality, celebrate a special occasion, or surprise your loved ones with a deeply personal gift. Thanks to the power of print-on-demand and our seamless partnership with Spreadshop, turning your creative ideas into real, premium-quality products has never been faster or easier.
Now that you know exactly how the design tool works, the only limit is your imagination! Head over to our studio, mix and match your favorite elements, and create something truly unforgettable.
👉 [Click here to open the Creator Studio on 33pixel.com and start designing now!]